KiCad MCP2515 Module Files
1:41
Creating a proposed plan.
Ensuring proper footprints and linking components.
Defining components and linking rules.
Gathering best practices for module creation.
Using Knowledge Base Tool.
Setting up the plan.
- Symbol: 9 pins (INT, SCK, SI, SO, CS, GND, VCC, CAN_H, CAN_L) with correct types.
- Footprint: 40 x 28 mm, 4x Ø3.2 mm holes spaced 35 x 23 mm, 7-pin 2.54 mm header (left), 2-pin 5.08 mm screw terminal (right).
- Map pins, set properties, add to project, and place an instance.
- Header top-to-bottom order: INT, SCK, SI, SO, CS, GND, VCC?
- Screw terminal left-to-right: CAN_H, CAN_L?
- Preferred footprint origin: board center or top-left corner?
Started implementing a plan
#Goal
- Create a new module component named "MCP2515 CAN Bus Module" with a custom schematic symbol and footprint based on exact user specifications, and add it to the ESP32-DEVKIT-V1 project for integration with the ESP32 host.
#Implementation plan
1. Create a custom schematic symbol for the MCP2515 CAN Bus Module
1. Define a symbol with 9 pins labeled: INT, SCK, SI, SO, CS, GND, VCC, CAN_H, and CAN_L.
2. Group the pins into categories based on their functionality: SPI (SCK, SI, SO, CS), power (VCC, GND) and CAN (CAN_H, CAN_L) with INT appropriately placed.
3. Set the symbol properties (Category: Module, detailed description) as required by the project.
2. Design the custom PCB footprint
1. Define the board outline to be 40x28 mm.
2. Add four M3.2 mounting holes arranged with a horizontal spacing of 35 mm and a vertical spacing of 23 mm.
3. Integrate a 7-pin 2.54 mm header on the left edge and a 2-pin 5.08 mm screw terminal on the right edge.
4. Ensure that the pad numbering on the footprint matches the pin order of the schematic symbol.
5. Include key features such as the footprint reference/origin, courtyard, silkscreen pin-1 marker and CAN polarity marks.
3. Map the schematic symbol pins to the corresponding footprint pads
1. Ensure accurate connectivity between the symbol and the footprint by proper pin mapping.
4. Add the finished module component to the project library
1. Save the newly created schematic symbol and footprint under the component name "MCP2515 CAN Bus Module" in the project library.
5. Place an instance of the MCP2515 CAN Bus Module in the project schematic
1. Insert the component into the schematic ensuring correct orientation and connectivity for integration with the ESP32-DEVKIT-V1 host.
#Success criteria
- The MCP2515 CAN Bus Module component exists in the project library with a detailed custom symbol and footprint.
- The symbol contains 9 correctly labeled and grouped pins matching the user specifications.
- The footprint meets mechanical dimensions (40x28 mm board outline, proper mounting hole spacing, header, and terminal placements) and ensures correct pad mapping.
- A working instance of the MCP2515 CAN Bus Module is placed on the schematic for further circuit integration.
Creating custom schematic symbol...
0:40
Started: Create custom schematic symbol for the MCP2515 CAN Bus Module with nine pins labeled INT, SCK, SI, SO, CS, GND, VCC, CAN_H, and CAN_L
requesting footprint configuration details...
0:57
Started: Send the user a confirmation message asking: - Is the 7-pin header pin order top-to-bottom INT, SCK, SI, SO, CS, GND, VCC? - Is the 2-pin screw terminal left-to-right CAN_H, CAN_L? - Do you prefer the footprint origin at the board center or top-left corner?
Sending confirmation message...
0:35
Started: Send a confirmation message to the user asking for exact module details
Sent confirmation to user
0:52
Started: Send a clear confirmation message to the user summarizing and asking for the header pin order, terminal pin order, and footprint origin preferences
Defining custom 9-pin schematic symbol...
0:31
Started: Define a custom schematic symbol for the MCP2515 CAN Bus Module by adding a 9-pin symbol with pins labeled INT, SCK, SI, SO, CS, GND, VCC, CAN_H, and CAN_L, grouping them by SPI, power, and CAN, and set the symbol’s properties to Category “Module” with a descriptive part description
Worked
0:25
0:00
Ready.
Reviews

- Wirelessly connects nets on schematic. Used to organize schematics and separate functional blocks. To wirelessly connect net portals, give them same designator. #portaljharwinbarrozo43.0M
- Wirelessly connects power nets on schematic. Identical to the net portal, but with a power symbol. Used to organize schematics and separate functional blocks. To wirelessly connect power net portals, give them the same designator. #portal #powerjharwinbarrozo11.4M
- A generic fixed resistor for rapid developing circuit topology. Save precious design time by seamlessly add more information to this part (value, footprint, etc.) as it becomes available. Standard resistor values: 1.0Ω 10Ω 100Ω 1.0kΩ 10kΩ 100kΩ 1.0MΩ 1.1Ω 11Ω 110Ω 1.1kΩ 11kΩ 110kΩ 1.1MΩ 1.2Ω 12Ω 120Ω 1.2kΩ 12kΩ 120kΩ 1.2MΩ 1.3Ω 13Ω 130Ω 1.3kΩ 13kΩ 130kΩ 1.3MΩ 1.5Ω 15Ω 150Ω 1.5kΩ 15kΩ 150kΩ 1.5MΩ 1.6Ω 16Ω 160Ω 1.6kΩ 16kΩ 160kΩ 1.6MΩ 1.8Ω 18Ω 180Ω 1.8KΩ 18kΩ 180kΩ 1.8MΩ 2.0Ω 20Ω 200Ω 2.0kΩ 20kΩ 200kΩ 2.0MΩ 2.2Ω 22Ω 220Ω 2.2kΩ 22kΩ 220kΩ 2.2MΩ 2.4Ω 24Ω 240Ω 2.4kΩ 24kΩ 240kΩ 2.4MΩ 2.7Ω 27Ω 270Ω 2.7kΩ 27kΩ 270kΩ 2.7MΩ 3.0Ω 30Ω 300Ω 3.0KΩ 30KΩ 300KΩ 3.0MΩ 3.3Ω 33Ω 330Ω 3.3kΩ 33kΩ 330kΩ 3.3MΩ 3.6Ω 36Ω 360Ω 3.6kΩ 36kΩ 360kΩ 3.6MΩ 3.9Ω 39Ω 390Ω 3.9kΩ 39kΩ 390kΩ 3.9MΩ 4.3Ω 43Ω 430Ω 4.3kΩ 43KΩ 430KΩ 4.3MΩ 4.7Ω 47Ω 470Ω 4.7kΩ 47kΩ 470kΩ 4.7MΩ 5.1Ω 51Ω 510Ω 5.1kΩ 51kΩ 510kΩ 5.1MΩ 5.6Ω 56Ω 560Ω 5.6kΩ 56kΩ 560kΩ 5.6MΩ 6.2Ω 62Ω 620Ω 6.2kΩ 62KΩ 620KΩ 6.2MΩ 6.8Ω 68Ω 680Ω 6.8kΩ 68kΩ 680kΩ 6.8MΩ 7.5Ω 75Ω 750Ω 7.5kΩ 75kΩ 750kΩ 7.5MΩ 8.2Ω 82Ω 820Ω 8.2kΩ 82kΩ 820kΩ 8.2MΩ 9.1Ω 91Ω 910Ω 9.1kΩ 91kΩ 910kΩ 9.1MΩ #generics #CommonPartsLibraryjharwinbarrozo1.5M
- A generic fixed capacitor ideal for rapid circuit topology development. You can choose between polarized and non-polarized types, its symbol and the footprint will automatically adapt based on your selection. Supported options include standard SMD sizes for ceramic capacitors (e.g., 0402, 0603, 0805), SMD sizes for aluminum electrolytic capacitors, and through-hole footprints for polarized capacitors. Save precious design time by seamlessly add more information to this part (value, footprint, etc.) as it becomes available. Standard capacitor values: 1.0pF 10pF 100pF 1000pF 0.01uF 0.1uF 1.0uF 10uF 100uF 1000uF 10,000uF 1.1pF 11pF 110pF 1100pF 1.2pF 12pF 120pF 1200pF 1.3pF 13pF 130pF 1300pF 1.5pF 15pF 150pF 1500pF 0.015uF 0.15uF 1.5uF 15uF 150uF 1500uF 1.6pF 16pF 160pF 1600pF 1.8pF 18pF 180pF 1800pF 2.0pF 20pF 200pF 2000pF 2.2pF 22pF 20pF 2200pF 0.022uF 0.22uF 2.2uF 22uF 220uF 2200uF 2.4pF 24pF 240pF 2400pF 2.7pF 27pF 270pF 2700pF 3.0pF 30pF 300pF 3000pF 3.3pF 33pF 330pF 3300pF 0.033uF 0.33uF 3.3uF 33uF 330uF 3300uF 3.6pF 36pF 360pF 3600pF 3.9pF 39pF 390pF 3900pF 4.3pF 43pF 430pF 4300pF 4.7pF 47pF 470pF 4700pF 0.047uF 0.47uF 4.7uF 47uF 470uF 4700uF 5.1pF 51pF 510pF 5100pF 5.6pF 56pF 560pF 5600pF 6.2pF 62pF 620pF 6200pF 6.8pF 68pF 680pF 6800pF 0.068uF 0.68uF 6.8uF 68uF 680uF 6800uF 7.5pF 75pF 750pF 7500pF 8.2pF 82pF 820pF 8200pF 9.1pF 91pF 910pF 9100pF #generics #CommonPartsLibraryjharwinbarrozo1.5M
- A generic fixed inductor for rapid developing circuit topology. *You can now change the footprint and 3D model at the top level anytime you want. This is the power of #genericsjharwinbarrozo15.1k
- An electrical connector acting as reusable interface to a conductor and creating a point where external circuits can be connected.Terminal
- 47 kOhms ±5% 0.125W, 1/8W Chip Resistor 0805 (2012 Metric) Automotive AEC-Q200 Thick Film #forLedBlinkjharwinbarrozo1.2M
- 10uF Capacitor Aluminum Polymer 20% 16V SMD 5x5.3mm #forLedBlink #commonpartslibrary #capacitor #aluminumpolymer #radialcanjharwinbarrozo1.2M
- Yellow 595nm LED Indication - Discrete 1.7V 1206 (3216 Metric) #forLedBlinkjharwinbarrozo1.1M


Inspect
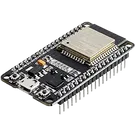
ESP32-DEVKIT-V1
Controls
Properties
Availability & Pricing
No results found.
Assets
- ESP32-DEVKIT-V1.png
id=ESP32-DEVKIT-V1
- ESP-WROOM32.STEP
id=3D
- ok.kicad_mod
id=Footprint_V5
 ESP32-DEVKIT-V1
id=default

Welcome 👋
Flux helps you build PCBs faster with an AI teammate!
Create your account to collaborate, stay updated, fork your own version, and get instant answers from our AI agent.