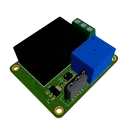
ESP32-H2 Relay Board Overview
1:12
Consulting help tool.
Evaluating user intents.
Choosing the right tool.
Reading docs about Why is the Plan bar Start button disabled or greyed out in Flux? What conditions must be met to run an AI plan, and how do I enable the Start button to execute it?.
Reading docs about Start button disabled for the Execution Plan bar in Flux Copilot. What prerequisites are required before the Start button becomes enabled, and how to resolve when it is greyed out?.
Reading docs about The Plan bar shows a plan but the Start button is greyed out. What does it mean (e.g., ambiguous plan) and how do I proceed to run it in Flux?.
Preparing help queries.
Addressing the Start button issue.
- Browse the docs: Flux Documentation
- Search the docs: Documentation Search Results
- Ask the community: Flux User Community
1:25
Considering tool usage.
Preparing the plan.
Detailing schematic and PCB fixes.
Clarifying execution capabilities.
Using Knowledge Base Tool.
Gathering project context and knowledge queries.
- Gather ERC/DRC results and triage issues.
- Schematic fixes: add a flyback diode on K1, complete LDO decoupling on U2, verify U4 drive and R1, ensure U1 EN bias.
- Verify nets and labels (12V, 3V3, GND).
- Re-run DRC; flag HV/LV creepage risks; adjust board size if needed.
- Re-run reviews, update BOM, and prep exports.
Ready to start.
Show Plan
-
Powering the Relay (K1): The relay specified, Ningbo Songle Relay SRD-12VDC-SL-C, operates on a 12V supply. The 12V net is used to energize the relay coil, enabling it to switch the connected load on or off. This is critical for controlling higher power devices or separate circuits that require isolation from the low-voltage control logic.
-
Input to Voltage Regulator (U2): The 12V net is used as the input voltage to the AMS1117-3.3 voltage regulator. This regulator converts the 12V down to 3.3V, which is a suitable power supply for the ESP32-H2 module (U1) and potentially other 3.3V logic components in the project.
-
Powering the AC-DC Converter (PS2): From your schematic description, the 12V seems to come from the Mean Well IRM-03-12 module, an AC-DC converter that converts the AC mains voltage to 12V DC output. This module provides the 12V supply for the project from an external AC source. However, it's mentioned as an output, which means the net labeled as 12V in the circuit actually represents the output from the power supply delivering 12V to other components in the circuit.
- ESP32-H2 (U1) :
- IO1 (pin 2)
- IO22 (pin 3)
- IO12 (pin 4)
- IO11 (pin 5)
- IO25 (pin 8)
- IO10 (pin 9)
- IO5 (pin 10)
- IO4 (pin 11)
-
ICL7109 is a high performance, low power, 12-bit A/D converter. While it doesn't directly accept a PWM signal from
analogWrite()for voltage control, you can definitely send digital values from a microcontroller to manage its conversion features. To do this, you will need to digitalWrite to the ICL7109's control lines (chip select, read/write, data, etc). -
The LM331 is a voltage-to-frequency converter where the output frequency is linearly proportional to the input voltage. So, to control the LM331, you can vary the voltage at the input pin in the range as specified in the datasheet. The
analogWrite()function, which produces a PWM signal, can be used to create a varying voltage if passed through a simple RC filter (Resistor and Capacitor in series). Please keep in mind that the frequency output range (1Hz to 1 MHz) is achievable by correctly setting up the external RC components as per the datasheet of LM331.
C
const int lm331Pin = A0; // The pin connected to LM331 input void setup() {} void loop() { // Create a PWM signal with value ranging between 0 (0V) and 1023 (3.3V) for (int i = 0; i <= 1023; i++) { analogWrite(lm331Pin, i); delay(10); // Smooth out transition. Adjust delay as needed. } }
- Segment 1: 1Hz - 10Hz
- Segment 2: 10Hz - 100Hz
- Segment 3: 100Hz - 1kHz
- Segment 4: 1kHz - 10kHz
- Segment 5: 10kHz - 100kHz
- Segment 1: 0 mV - 40 mV
- Segment 2: 40 mV - 80 mV
- Segment 3: 80 mV - 120 mV
- Segment 4: 120 mV - 160 mV
- Segment 5: 160 mV - 200 mV
analogWrite() function on ESP32-H2 operates with a 8-bit resolution, i.e., the argument for analogWrite() ranges from 0 (representing 0V) to 255 (representing 3.3V). This makes each step approximately equal to 3.3V / 255 ≈ 13 mV.C
const int lm331Pin = A0; //The pin connected to LM331 input void setup() {} void loop() { for (int i = 0; i <= 15; i++) { //15 gives roughly 200mV as each step is about 13mV analogWrite(lm331Pin, i); delay(1000); // Maintain each level for 1 second } }
59c9d24164fcc7206473915f7beeea21, el pin P1 de U4 está conectado al pin P2 de la resistencia R1. Esto significa que cuando fluye corriente a través de la resistencia R1, una parte de esa corriente también fluirá a través del pin P1 de U4, activando el optoacoplador.9e145ebae8054a65c361dfd6cb3bb6a7. Esta es probablemente la ruta a través de la cual la corriente de entrada fluye hacia afuera del optoacoplador.702a331d93565ca946a48bc41377a91b (la cual incluye al pin U1:IO22, la resistencia R1 y el pin P1 de U4) determina si el optoacoplador U4 está activo o no.-
Start a New Project: When you first log into Flux, you can start a new project by selecting the option to create a new schematic and PCB layout.
-
Designing the Schematic:
- Drag components from the library onto the schematic canvas.
- Connect components by drawing wires between their pins.
- Use labels and nets to make connections clearer and to organize your design.
-
Transitioning to PCB Layout:
- Once your schematic is complete, you can transition to laying out the PCB.
- Flux will translate your schematic into a board design, where you can place components physically on the board.
- Route traces between components, adhering to good layout practices such as minimizing trace lengths and avoiding noise-sensitive traces.
-
Define Board Shape and Size: Use the PCB layout tools to define the shape and dimensions of your board, including any cutouts or mounting holes.
-
Check Design Rules (DRC): Always run a design rule check (DRC) to ensure there are no errors in your schematic or PCB, such as short circuits or traces that are too close together.
-
Generating Output Files: Once the design is finalized and checked, generate the necessary output files for fabrication, such as Gerber files and a Bill of Materials (BOM).
-
Collaboration and Sharing: Flux supports collaboration, allowing you to share your project with team members and get feedback.
- For step-by-step tutorials and guidance, visit the Tutorials and Reference sections of the documentation36b2c502−0b4a−59ba−b0a5−ec46aaf87ae7.
- YouTube offers video tutorials and example projectsf4f73a28−c83e−5598−bff3−f06b27d9b1ab.
- For direct support or to join the community, the Slack channel is highly recommended0105ac37−3bee−5c69−9a02−0747e954ec94.
- U1:(IO22)
- RELAY:(P1)
- R1:(P1)
C
#define RELAY_CONTROL_PIN 22 void setup() { pinMode(RELAY_CONTROL_PIN, OUTPUT); // Initialise the IO22 as an output } void loop() { digitalWrite(RELAY_CONTROL_PIN, HIGH); // Set the pin high to activate the relay delay(1000); // Wait for 1 second (1000 milliseconds) digitalWrite(RELAY_CONTROL_PIN, LOW); // Set the pin low to de-activate the relay delay(1000); // Wait for 1 second }
1
- Pin 1 (EN): Enable pin, used to enable or disable the module.
- Pin 2 (IO1): General purpose IO pin.
- Pin 3 (IO22): General purpose IO pin.
- Pin 4 (IO12): General purpose IO pin.
- Pin 5 (IO11): General purpose IO pin.
- Pin 6 (3.3V): Power supply pin, which accepts 3.3V.
- Pin 7 (GND): Ground pin.
- Pin 8 (IO25): General purpose IO pin.
- Pin 9 (IO10): General purpose IO pin.
- Pin 10 (IO5): General purpose IO pin.
- Pin 11 (IO4): General purpose IO pin.
- Pin 12 (NC): Not Connected.
-
Visit the manufacturer's website: Go to the Espressif official website. They usually have a dedicated section for their products where you can find datasheets.
-
Search for the product: Use the website's search feature to look for "ESP32-H2-WROOM-03."
-
Look for documentation: Once on the product page, there should be tabs or links for documentation, including datasheets, technical reference manuals, and application notes.
-
Download section: Often, there is a download section where you can directly download the datasheet in PDF format.
-
Third-party websites: If you're having difficulty finding the datasheet on the manufacturer's website, websites like Digikey, Mouser, and Octopart aggregate datasheets and technical documents from manufacturers.
Reviews

- Wirelessly connects nets on schematic. Used to organize schematics and separate functional blocks. To wirelessly connect net portals, give them same designator. #portaljharwinbarrozo43.0M
- Wirelessly connects power nets on schematic. Identical to the net portal, but with a power symbol. Used to organize schematics and separate functional blocks. To wirelessly connect power net portals, give them the same designator. #portal #powerjharwinbarrozo11.4M
- A generic fixed resistor for rapid developing circuit topology. Save precious design time by seamlessly add more information to this part (value, footprint, etc.) as it becomes available. Standard resistor values: 1.0Ω 10Ω 100Ω 1.0kΩ 10kΩ 100kΩ 1.0MΩ 1.1Ω 11Ω 110Ω 1.1kΩ 11kΩ 110kΩ 1.1MΩ 1.2Ω 12Ω 120Ω 1.2kΩ 12kΩ 120kΩ 1.2MΩ 1.3Ω 13Ω 130Ω 1.3kΩ 13kΩ 130kΩ 1.3MΩ 1.5Ω 15Ω 150Ω 1.5kΩ 15kΩ 150kΩ 1.5MΩ 1.6Ω 16Ω 160Ω 1.6kΩ 16kΩ 160kΩ 1.6MΩ 1.8Ω 18Ω 180Ω 1.8KΩ 18kΩ 180kΩ 1.8MΩ 2.0Ω 20Ω 200Ω 2.0kΩ 20kΩ 200kΩ 2.0MΩ 2.2Ω 22Ω 220Ω 2.2kΩ 22kΩ 220kΩ 2.2MΩ 2.4Ω 24Ω 240Ω 2.4kΩ 24kΩ 240kΩ 2.4MΩ 2.7Ω 27Ω 270Ω 2.7kΩ 27kΩ 270kΩ 2.7MΩ 3.0Ω 30Ω 300Ω 3.0KΩ 30KΩ 300KΩ 3.0MΩ 3.3Ω 33Ω 330Ω 3.3kΩ 33kΩ 330kΩ 3.3MΩ 3.6Ω 36Ω 360Ω 3.6kΩ 36kΩ 360kΩ 3.6MΩ 3.9Ω 39Ω 390Ω 3.9kΩ 39kΩ 390kΩ 3.9MΩ 4.3Ω 43Ω 430Ω 4.3kΩ 43KΩ 430KΩ 4.3MΩ 4.7Ω 47Ω 470Ω 4.7kΩ 47kΩ 470kΩ 4.7MΩ 5.1Ω 51Ω 510Ω 5.1kΩ 51kΩ 510kΩ 5.1MΩ 5.6Ω 56Ω 560Ω 5.6kΩ 56kΩ 560kΩ 5.6MΩ 6.2Ω 62Ω 620Ω 6.2kΩ 62KΩ 620KΩ 6.2MΩ 6.8Ω 68Ω 680Ω 6.8kΩ 68kΩ 680kΩ 6.8MΩ 7.5Ω 75Ω 750Ω 7.5kΩ 75kΩ 750kΩ 7.5MΩ 8.2Ω 82Ω 820Ω 8.2kΩ 82kΩ 820kΩ 8.2MΩ 9.1Ω 91Ω 910Ω 9.1kΩ 91kΩ 910kΩ 9.1MΩ #generics #CommonPartsLibraryjharwinbarrozo1.5M
- A generic fixed capacitor ideal for rapid circuit topology development. You can choose between polarized and non-polarized types, its symbol and the footprint will automatically adapt based on your selection. Supported options include standard SMD sizes for ceramic capacitors (e.g., 0402, 0603, 0805), SMD sizes for aluminum electrolytic capacitors, and through-hole footprints for polarized capacitors. Save precious design time by seamlessly add more information to this part (value, footprint, etc.) as it becomes available. Standard capacitor values: 1.0pF 10pF 100pF 1000pF 0.01uF 0.1uF 1.0uF 10uF 100uF 1000uF 10,000uF 1.1pF 11pF 110pF 1100pF 1.2pF 12pF 120pF 1200pF 1.3pF 13pF 130pF 1300pF 1.5pF 15pF 150pF 1500pF 0.015uF 0.15uF 1.5uF 15uF 150uF 1500uF 1.6pF 16pF 160pF 1600pF 1.8pF 18pF 180pF 1800pF 2.0pF 20pF 200pF 2000pF 2.2pF 22pF 20pF 2200pF 0.022uF 0.22uF 2.2uF 22uF 220uF 2200uF 2.4pF 24pF 240pF 2400pF 2.7pF 27pF 270pF 2700pF 3.0pF 30pF 300pF 3000pF 3.3pF 33pF 330pF 3300pF 0.033uF 0.33uF 3.3uF 33uF 330uF 3300uF 3.6pF 36pF 360pF 3600pF 3.9pF 39pF 390pF 3900pF 4.3pF 43pF 430pF 4300pF 4.7pF 47pF 470pF 4700pF 0.047uF 0.47uF 4.7uF 47uF 470uF 4700uF 5.1pF 51pF 510pF 5100pF 5.6pF 56pF 560pF 5600pF 6.2pF 62pF 620pF 6200pF 6.8pF 68pF 680pF 6800pF 0.068uF 0.68uF 6.8uF 68uF 680uF 6800uF 7.5pF 75pF 750pF 7500pF 8.2pF 82pF 820pF 8200pF 9.1pF 91pF 910pF 9100pF #generics #CommonPartsLibraryjharwinbarrozo1.5M
- A generic fixed inductor for rapid developing circuit topology. *You can now change the footprint and 3D model at the top level anytime you want. This is the power of #genericsjharwinbarrozo15.5k
- An electrical connector acting as reusable interface to a conductor and creating a point where external circuits can be connected.Terminal
- 47 kOhms ±5% 0.125W, 1/8W Chip Resistor 0805 (2012 Metric) Automotive AEC-Q200 Thick Film #forLedBlinkjharwinbarrozo1.2M
- 10uF Capacitor Aluminum Polymer 20% 16V SMD 5x5.3mm #forLedBlink #commonpartslibrary #capacitor #aluminumpolymer #radialcanjharwinbarrozo1.2M
- Yellow 595nm LED Indication - Discrete 1.7V 1206 (3216 Metric) #forLedBlinkjharwinbarrozo1.1M


Pricing & Availability
Distributor | Qty 1 |
|---|---|
Digi-Key | $7.35–$7.70 |
LCSC | $6.63–$6.74 |
Mouser | $7.69 |
Assets

ESP32-H2 Relay Board.png
ESP32-H2 Relay BoardThumbnailControls
Welcome 👋
Flux helps you build PCBs faster with an AI teammate!
Create your account to collaborate, stay updated, fork your own version, and get instant answers from our AI agent.
praveenshetty21
copilot