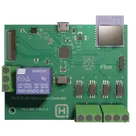
RP2040 CAN-Bus Board Design
Thought for 6 sec
I can’t execute project edits in this session because tool execution is unavailable.
Requested design scope:
- Main controller: RP2040
- Input power: 5–48 V DC
- Communication: CAN bus transmit/receive
Recommended architecture to implement next:
- 5–48 V protected power input with fuse/polyfuse, reverse-polarity protection, TVS surge protection, and input filtering.
- Wide-input buck regulator from 5–48 V to 5 V or 3.3 V, followed by a clean 3.3 V rail for RP2040 and CAN logic.
- RP2040 core circuit with:
- 12 MHz crystal and load capacitors
- QSPI flash
- BOOTSEL/reset support
- SWD/debug header
- USB optional, if firmware loading over USB is desired
- Full decoupling on every supply pin
- CAN interface:
- SPI CAN controller such as MCP2515, since RP2040 has no native CAN peripheral
- 3.3 V-compatible CAN transceiver, or isolated CAN transceiver if the bus environment is noisy/industrial
- CANH/CANL connector
- 120 Ω termination selectable by jumper/DIP switch
- ESD/TVS protection on CANH/CANL
- Common-mode choke if needed for EMC
- Layout considerations:
- Keep the buck regulator away from RP2040 crystal and CAN signal paths
- Short, tight CANH/CANL differential routing
- Solid ground return
- Place CAN protection close to the connector
- Place RP2040 decoupling capacitors directly at power pins
Important design decisions still needed:
- Required output current from the board / any external loads.
- Whether CAN should be isolated.
- Whether USB programming/debug is required.
- Number and type of power/CAN connectors.
- Board size or enclosure constraints.
- Whether this is a new board or a modification of the existing “PICO Smart Automation Controller” project.
Once execution is available, the next step is to create the schematic blocks, select datasheet-grounded parts for the 5–48 V power stage and CAN interface, run ERC/review, then proceed to layout only after schematic confirmation.
Isolated CAN, 500mA
Add USB-C and SWD
Recommend power/CAN parts
Save design requirements
Review U3 fit
Welcome 👋
Flux helps you build PCBs faster with an AI teammate!
Create your account to collaborate, stay updated, fork your own version, and get instant answers from our AI agent.