Arduino Schematics
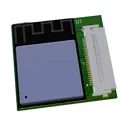
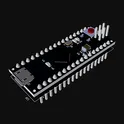
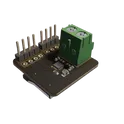
Arduino Watch Module
This module is a minimalist Arduino Watch design. Consisting of a Microchip ATTINY85-20SU microcontroller, an OLED display for visual output, two user buttons for interface, and a Li-ion Battery for power. The schematic also includes graphic user interface with ISP for programming and minimal passive components for functionality. #wearableDevices #project #Template #projectTemplate #reusable #module #simple-embedded #microchip #arduino #sublayout
3 Stars
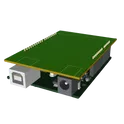
Arduino Uno R3 Shield for PureData VER1.0
Template for Arduino Uno R3 Shield. Include an official pinout so you will always know Arduino names, the alternative roles of pins, which one is SDA, or SCL, etc. On PCB you can find the 3D model of the Arduino Uno R3 itself along with the board outline on the silkscreen. #Arduino #Uno #Shield #Template #project-template #project
3 Stars
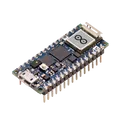
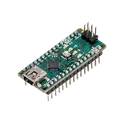
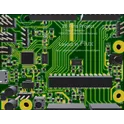
Arduino Nano Shield Template
Template for Arduino Nano Shield. Include an official pinout so you will always know Arduino names, the alternative roles of pins, which one is SDA, or SCL, etc. On PCB you can find the 3D model of the Arduino Nano itself along with the board outline on the silkscreen. #Arduino #Nano #Shield #template #project #project-template
3 Stars
Seeed Studio Wio Terminal.
The Wio Terminal is a SAMD51-based microcontroller with Wireless Connectivity powered by Realtek RTL8720DN that’s compatible with Arduino and MicroPython. Currently, wireless connectivity is only supported by Arduino. It runs at 120MHz (Boost up to 200MHz), 4MB External Flash and 192KB RAM. It supports both Bluetooth and Wi-Fi providing backbone for IoT projects. This repository contains all the necessary documentation you need to manufacture Wio Terminal: https://github.com/Seeed-Studio/OSHW-WioTerminal
3 Stars

ArduinoMicro-MidiFreak-PB
Arduino Micro - MIDI Controller It uses the Arduino Micro as USB midi controller. It has 1 capacitive touch octave (12 Keys), 2 rotary encoders, a button, and a proximity sensor that can be used as a mod wheel, sustain pedal or MPE. The oled screen displays the different configuration options. It can be set to any channel or C.C. so it can be used to modify other instruments behavior. The capacitive touch keys can also be used as 12 drum machine pads.
3 Stars
Bug Zapper Counter
How designed circuit works? When the battery is turned on, the high-frequency oscillator composed of the transistor Q2 and the step-up transformer T1 is energized using the 3V DC supply generating a high-frequency alternating current of about 18kHz, boosted by T1 to about 500V. This high voltage ranging at 500V is then further stepped up using a ladder network, which is made up of three 1N4007 Diodes, capacitors C2- C4. This network steps the T output to approximately three times its original value and we get around 1500V which gets stored inside a high voltage PPC capacitor positioned at the extreme end of the ladder network. Now for bug counter purpose, I am sensing the voltage on the output cap, I added a few diodes D1-D3 on the bottom side so that you see a high to low transition when a bug is zapped. This works only if the output cap is fully discharged when a bug is zapped, which is unlikely. Worth a try if you have some diodes around, and a fair amount of bugs too. Further, Arduino nano is used to count these output from the diode, and display on an LCD.
3 Stars
Arduino Mega 2560 R3
The Arduino Mega is a microcontroller board based on the ATmega2560. It has 54 digital input/output pins (of which 14 can be used as PWM outputs), 16 analog inputs, 4 UARTs (hardware serial ports), a 16 MHz crystal oscillator, a USB connection, a power jack, an ICSP header, and a reset button.
3 Stars
MAX98357 Audio DAC Breakout 077b
This compact breakout board makes it easy to add high-quality audio output to your microcontroller projects using the MAX98357A/B Class D audio amplifier. Perfect for Arduino, ESP32, Raspberry Pi, or any microcontroller with I2S output capabilities. Features High-Performance Audio: Delivers Class AB audio quality with Class D efficiency (92% efficient at 1W) Powerful Output: 3.2W into 4Ω speakers at 5V supply Clean Sound: Low distortion (0.013% THD+N at 1kHz) Wide Supply Range: Operates from 2.5V to 5.5V Simplified I2S Interface: No MCLK required, just BCLK, LRCLK, and DIN Selectable Gain: Solder jumpers for easy gain selection (3dB, 6dB, 9dB, 12dB, or 15dB) Channel Selection: Configure for left, right, or combined (mono) output Filterless Design: No need for external output filtering components Compact Form Factor: Minimal board space with optimized layout Applications Smart speakers and voice assistants Portable audio devices IoT audio projects Gaming devices and sound effects Educational audio projects Digital instrument amplification The FLUX MAX98357 breakout board requires only three I/O pins plus power, making it the perfect audio solution for projects where simplicity and sound quality matter.
2 Stars
Arduino Uno Optical Sensor Shield
Arduino Uno Shield for Blue Light Optical Sensor. The circuit generates a 2.1kHz sinusoidal signal to send to LEDs and contains a filtering and amplification circuit to preprocess the signal. Powered by 24V and regulated down to 12V and 5V to power Arduino. #ArduinoUno
2 Stars
Control Servomotor con finales de carrera svAn
Template for Arduino Uno R3 Shield. Include an official pinout so you will always know Arduino names, the alternative roles of pins, which one is SDA, or SCL, etc. On PCB you can find the 3D model of the Arduino Uno R3 itself along with the board outline on the silkscreen. #Arduino #Uno #Shield #Template #project-template #project
2 Stars