PCB Design for Adafruit RP2040
0:00
Work done
- Project description updated to include Feather RP2040, MCP25625 CAN, ILI9341 TFT, 12 V→5 V buck, CAN H/G/L terminal block (#FeatherRP2040 #CAN #TFT #BuckConverter)
- System architecture diagram added to project property
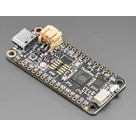
- Major ICs placed:
- Power connector: J3 TB003-500-P02BE (12 V in)
- Buck support:
- CAN termination:
- Decoupling: C11–C16 0.1 µF, 10 V each
- Pull-ups: R11, R12
- Connectors:
- Nets wired: SPI (SCK/MOSI/MISO), CS_CAN, CS_TFT, DC, RST, IRQ, 12 V→buck VIN, buck VOUT→VBUS/VIN1/LITE1, GND, CANH/CANL
Cannot do (to be completed by you)
- Ensure all components have footprints by setting each part’s Package property
- Add four Ø3.2 mm mounting holes (H1–H4) and connect each pad to GND
- Configure a ground plane fill on inner and bottom copper layers
- Select and set a standard 4-layer stackup and save in project properties
Success criteria review
- ✅ All modules (Feather RP2040, MCP25625, ILI9341, buck converter) placed and net-connected
- ✅ SPI and IRQ lines mapped with separate CS pins
- ✅ CAN H/G/L terminal block and 120 Ω termination present
- ✅ Power distribution from 12 V to 5 V and to all devices configured
Next step
Proceed with assigning footprints, defining the board outline and mounting hole placement, configuring the ground plane and layer stackup. Let me know when you’re ready to continue.
102 days


Welcome 👋
Flux accelerates your PCB design with AI.
Create your account to start using this component and bring your ideas to life.

jlamflux
copilot
jlamflux
copilot