WiFi Camera Project Overview

1:27

Determining response for Flux troubleshooting.

Using the help tool for Flux.

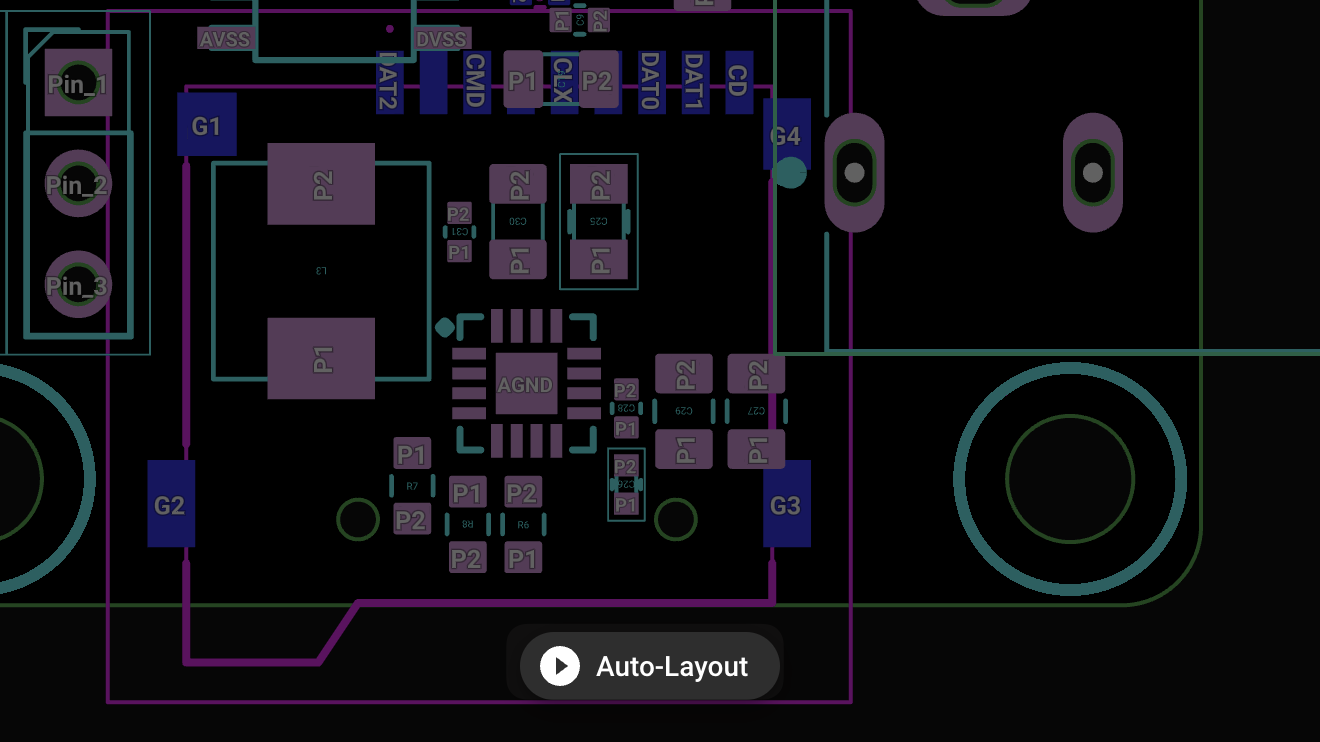
Exploring Auto-Layout in PCB view.

Reading docs about Auto-Layout button disabled or grayed out in PCB view. What are prerequisites and reasons it cannot start? How to enable and run it, required steps (2D vs 3D view, unrouted nets, board outline, DRC issues, selection modes) and troubleshooting tips..

Reading docs about Auto-Layout button greyed out or unavailable in PCB editor. Requirements and reasons it may be disabled (credit availability, 3D view, selection mode, no nets, missing board outline). How to enable..

Reading docs about Troubleshoot: auto-route / auto layout button not clickable in PCB editor. Preconditions to run, reasons disabled, and steps to enable and start..

Focusing on enabling Auto-Layout.

Preparing the final answer.

This is the most relevant entry I found related to Auto-Layout:
“Simplify your PCB design process by using Auto-Layout, an AI-powered feature that automatically routes your design.
Overview
Auto-Layout leverages Flux's Copilot AI to handle the time-intensive task of routing your PCB. This tool is ideal for simple to medium-complexity boards and can significantly accelerate your workflow. However, Auto-Layout has a few limitations to keep in mind, including credit consumption, iteration management, and time requirements.
This guide helps you get started, navigate the process, and make the most of Auto-Layout while avoiding common pitfalls.
Getting Started Initiate Auto-Layout
  1. Make sure your schematic and component placement are finalized.
    1. Adjust any specific constraints for your board, such as dimensions, component orientations, or keep-out zones. Learn more.
    2. Confirm your credit allowance before starting. Auto-Layout consumes Copilot credits per job based on complexity. Learn more.
  2. Click on the auto-route button at the bottom page.”
Image

Image

Quick check: Do you see the “auto-route” button at the bottom of the PCB page as shown, and do you have Copilot credits available? If yes but it’s still disabled, tell me exactly what you see on the button so I can help further.
Describe button state
Ask about requirements
Mention credits and view
Clarify design status
Ask about project type
155 days

To get started, talk to Flux or create a New Document.

Documents

    Documents are markdown text files which describe project goals, capture details, or even simulation outputs.

    Assets

    WiFi Camera with Motion Detection-removebg-preview.png

    WiFi Camera with Motion Detection-removebg-preview.png

    WiFi Camera with Motion Detection-removebg-previewThumbnail

    WiFi Camera with Motion Detection Reference Design dff9

    WiFi Camera with Motion Detection Reference Design dff9 thumbnail
    This project is a WiFi Camera with Motion Detection, utilizing ESP32-CAM module and HC-SR501 PIR sensor. The camera is activated by the sensor's output. The system also includes power regulation and communication headers for setup and control. #WiFi #MCU #PIR #ReferenceDesign #project #ESP32 #camera #referenceDesign #edgeComputing #espressif #template #reference-design

    Pricing & Availability

    Distributor

    Qty 1

    Digi-Key

    $0.01–$36.00

    LCSC

    $0.06–$0.08

    Verical

    $0.01–$0.02

    Controls