DC Motor Control Options
73 days
Looking at the datasheet of this component, can you group together pins by their functions? for example for Power, 3v3, gnd_1 gnd_2 etc
NOTE: If you group them, can you not add the same pin if you already added them in a group? You should know which pin function is common for its function
Worked for 2 mins 23 sec
73 days
I grouped every current Arduino Mega2560 terminal into one primary function group only, using the datasheet pin functions and avoiding duplicate pin assignments. Full grouping is in the Arduino Mega2560 Pin Function Groups project file.
New Comment
6
explain this project.
Delete
2y
@copilot explain this project.
2y
This project appears to be based on designing a schematic for an Arduino Mega2560 using components and pins mapped out in a structured manner, though it currently lacks electrical connections between these components. The Arduino Mega2560 is a microcontroller board based on the ATmega2560. It has numerous digital and analog pins suitable for interfacing with various peripherals and sensors, making it a popular choice for both hobbyists and professionals for prototyping complex projects. Within this project description, each component or pin is represented with a designated prefix (mostly "P") and a unique identifier or name that corresponds to either Arduino Mega2560 pins or common power rails such as +5V, +3.3V, and GND (Ground).
Here's a concise overview of the textual components specified:
- Arduino Mega2560 MCU: This is the core of the project, mentioned at the outset by specifying it as an ATmega2560 AVR MCU evaluation board.
- Designator Prefixes and Pin Identifications: Each pin or power rail specified in the project has a unique designator (e.g.,
14,+5V_2,SDA). These designators will be crucial in mapping the connections between different parts of the circuit. - Pin Properties: Each pin has properties such as "Terminal Type" and "Pin Type" declared as passive and unspecified, respectively. While these properties are noted, they don't currently affect the connections—it seems more like a template setup before the actual connections are defined.
- Special Pins: There are several pins with specific functions noted, like
SDA(Serial Data Line for I2C communication),SCL(Serial Clock Line for I2C),AREF(Analog Reference Voltage),IOREF(Input/Output Reference Voltage), andRESET. - Power Rails: Multiple designators for +5V (
+5V_1,+5V_2,+5V_3), +3.3V (+3V3), and Ground (GND1,GND2,GND3,GND4,GND5) are mentioned. These are power supply lines crucial for powering the Arduino and its peripherals. - Analog and Digital Pins: Pins represented with
ADprefix are likely meant for analog-digital purposes, while those with numeric designators typically refer to digital pins on the Arduino Mega2560.
As of the description provided, there are no electrical connections made yet. This suggests the project is in an initial or planning stage, where the components and pins of interest have been identified but not yet interconnected in a schematic to fulfill a specific functionality. The next step would involve defining the electrical connections between these components according to the specific requirements of the intended application, which could range from simple LED blinking to more complex tasks like sensor data logging or wireless communication.
2y
19
Reviews
 A generic fixed inductor suitable for rapid circuit topology development. The footprint automatically adapts based on the selected package, supporting standard SMD sizes (e.g., 0402, 0603, 0805) as well as well-known inductor packages such as SDR1806, PA4320, SRN6028, and SRR1260. Standard inductor values: 1.0 nH, 10 nH, 100 nH, 1.0 µH, 10 µH, 100 µH, 1.0 mH 1.2 nH, 12 nH, 120 nH, 1.2 µH, 12 µH, 120 µH, 1.2 mH 1.5 nH, 15 nH, 150 nH, 1.5 µH, 15 µH, 150 µH, 1.5 mH 1.8 nH, 18 nH, 180 nH, 1.8 µH, 18 µH, 180 µH, 1.8 mH 2.2 nH, 22 nH, 220 nH, 2.2 µH, 22 µH, 220 µH, 2.2 mH 2.7 nH, 27 nH, 270 nH, 2.7 µH, 27 µH, 270 µH, 2.7 mH 3.3 nH, 33 nH, 330 nH, 3.3 µH, 33 µH, 330 µH, 3.3 mH 3.9 nH, 39 nH, 390 nH, 3.9 µH, 39 µH, 390 µH, 3.9 mH 4.7 nH, 47 nH, 470 nH, 4.7 µH, 47 µH, 470 µH, 4.7 mH 5.6 nH, 56 nH, 560 nH, 5.6 µH, 56 µH, 560 µH, 5.6 mH 6.8 nH, 68 nH, 680 nH, 6.8 µH, 68 µH, 680 µH, 6.8 mH 8.2 nH, 82 nH, 820 nH, 8.2 µH, 82 µH, 820 µH, 8.2 mH #generics #CommonPartsLibraryjharwinbarrozo16.5k
- A generic fixed capacitor ideal for rapid circuit topology development. You can choose between polarized and non-polarized types, its symbol and the footprint will automatically adapt based on your selection. Supported options include standard SMD sizes for ceramic capacitors (e.g., 0402, 0603, 0805), SMD sizes for aluminum electrolytic capacitors, and through-hole footprints for polarized capacitors. Save precious design time by seamlessly add more information to this part (value, footprint, etc.) as it becomes available. Standard capacitor values: 1.0pF, 10pF, 100pF, 1000pF, 0.01uF, 0.1uF, 1.0uF, 10uF, 100uF, 1000uF, 10000uF 1.1pF, 11pF, 110pF, 1100pF 1.2pF, 12pF, 120pF, 1200pF 1.3pF, 13pF, 130pF, 1300pF 1.5pF, 15pF, 150pF, 1500pF, 0.015uF, 0.15uF, 1.5uF, 15uF, 150uF, 1500uF 1.6pF, 16pF, 160pF, 1600pF 1.8pF, 18pF, 180pF, 1800pF 2.0pF, 20pF, 200pF, 2000pF 2.2pF, 22pF, 220pF, 2200pF, 0.022uF, 0.22uF, 2.2uF, 22uF, 220uF, 2200uF 2.4pF, 24pF, 240pF, 2400pF 2.7pF, 27pF, 270pF, 2700pF 3.0pF, 30pF, 300pF, 3000pF 3.3pF, 33pF, 330pF, 3300pF, 0.033uF, 0.33uF, 3.3uF, 33uF, 330uF, 3300uF 3.6pF, 36pF, 360pF, 3600pF 3.9pF, 39pF, 390pF, 3900pF 4.3pF, 43pF, 430pF, 4300pF 4.7pF, 47pF, 470pF, 4700pF, 0.047uF, 0.47uF, 4.7uF, 47uF, 470uF, 4700uF 5.1pF, 51pF, 510pF, 5100pF 5.6pF, 56pF, 560pF, 5600pF 6.2pF, 62pF, 620pF, 6200pF 6.8pF, 68pF, 680pF, 6800pF, 0.068uF, 0.68uF, 6.8uF, 68uF, 680uF, 6800uF 7.5pF, 75pF, 750pF, 7500pF 8.2pF, 82pF, 820pF, 8200pF 9.1pF, 91pF, 910pF, 9100pF #generics #CommonPartsLibraryjharwinbarrozo1.5M
- A generic fixed resistor ideal for rapid circuit topology development. Its footprint automatically adapts based on the selected package case code—supporting 0402, 0603, 0805, 1203, and many other standard SMD packages, as well as axial horizontal and vertical configurations. Save precious design time by seamlessly add more information to this part (value, footprint, etc.) as it becomes available. Standard resistor values: 1.0 ohm, 10 ohm, 100 ohm, 1.0k ohm, 10k ohm, 100k ohm, 1.0M ohm 1.1 ohm, 11 ohm, 110 ohm, 1.1k ohm, 11k ohm, 110k ohm, 1.1M ohm 1.2 ohm, 12 ohm, 120 ohm, 1.2k ohm, 12k ohm, 120k ohm, 1.2M ohm 1.3 ohm, 13 ohm, 130 ohm, 1.3k ohm, 13k ohm, 130k ohm, 1.3M ohm 1.5 ohm, 15 ohm, 150 ohm, 1.5k ohm, 15k ohm, 150k ohm, 1.5M ohm 1.6 ohm, 16 ohm, 160 ohm, 1.6k ohm, 16k ohm, 160k ohm, 1.6M ohm 1.8 ohm, 18 ohm, 180 ohm, 1.8K ohm, 18k ohm, 180k ohm, 1.8M ohm 2.0 ohm, 20 ohm, 200 ohm, 2.0k ohm, 20k ohm, 200k ohm, 2.0M ohm 2.2 ohm, 22 ohm, 220 ohm, 2.2k ohm, 22k ohm, 220k ohm, 2.2M ohm 2.4 ohm, 24 ohm, 240 ohm, 2.4k ohm, 24k ohm, 240k ohm, 2.4M ohm 2.7 ohm, 27 ohm, 270 ohm, 2.7k ohm, 27k ohm, 270k ohm, 2.7M ohm 3.0 ohm, 30 ohm, 300 ohm, 3.0K ohm, 30K ohm, 300K ohm, 3.0M ohm 3.3 ohm, 33 ohm, 330 ohm, 3.3k ohm, 33k ohm, 330k ohm, 3.3M ohm 3.6 ohm, 36 ohm, 360 ohm, 3.6k ohm, 36k ohm, 360k ohm, 3.6M ohm 3.9 ohm, 39 ohm, 390 ohm, 3.9k ohm, 39k ohm, 390k ohm, 3.9M ohm 4.3 ohm, 43 ohm, 430 ohm, 4.3k ohm, 43K ohm, 430K ohm, 4.3M ohm 4.7 ohm, 47 ohm, 470 ohm, 4.7k ohm, 47k ohm, 470k ohm, 4.7M ohm 5.1 ohm, 51 ohm, 510 ohm, 5.1k ohm, 51k ohm, 510k ohm, 5.1M ohm 5.6 ohm, 56 ohm, 560 ohm, 5.6k ohm, 56k ohm, 560k ohm, 5.6M ohm 6.2 ohm, 62 ohm, 620 ohm, 6.2k ohm, 62K ohm, 620K ohm, 6.2M ohm 6.8 ohm, 68 ohm, 680 ohm, 6.8k ohm, 68k ohm, 680k ohm, 6.8M ohm 7.5 ohm, 75 ohm, 750 ohm, 7.5k ohm, 75k ohm, 750k ohm, 7.5M ohm 8.2 ohm, 82 ohm, 820 ohm, 8.2k ohm, 82k ohm, 820k ohm, 8.2M ohm 9.1 ohm, 91 ohm, 910 ohm, 9.1k ohm, 91k ohm, 910k ohm, 9.1M ohm #generics #CommonPartsLibraryjharwinbarrozo1.5M
- An electrical connector acting as reusable interface to a conductor and creating a point where external circuits can be connected.Terminal
- Wirelessly connects nets on schematic. Used to organize schematics and separate functional blocks. To wirelessly connect net portals, give them same designator. #portaljharwinbarrozo43.0M
- General Purpose Thick Film Standard Power and High-Power Chip Resistor 47 kOhms ±5% 0.125W, 1/8W Chip Resistor 0805 (2012 Metric) Automotive AEC-Q200 Thick Film Features: - RMCF – standard power ratings - RMCP – high power ratings - Nickel barrier terminations standard - Power derating from 100% at 70ºC to zero at +155ºC - RoHS compliant, REACH compliant, and halogen free - AEC-Q200 compliantjharwinbarrozo1.2M
- 10 µF 16 V Aluminum - Polymer Capacitors Radial, Can - SMD 30mOhm 2000 Hrs @ 105°C #commonpartslibrary #capacitor #aluminumpolymer #radialcanjharwinbarrozo1.2M
- Battery Holder (Open) Coin, 20.0mm 1 Cell SMD (SMT) Tab bate or batt #forLedBlinkjharwinbarrozo700.5k


Arduino Mega2560
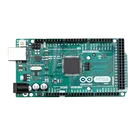
ATmega2560 Arduino Mega2560 AVR® ATmega AVR MCU 8-Bit Embedded Evaluation Board
The MEGA 2560 is designed for more complex projects. With 54
digital I/O pins, 16 analog inputs and a larger space for your sketch
it is the recommended board for 3D printers and robotics projects.
This gives your projects plenty of room and opportunities.
The Arduino Mega 2560 is a microcontroller board based on the ATmega2560. It
has 54 digital input/output pins (of which 15 can be used as PWM outputs), 16
analog inputs, 4 UARTs (hardware serial ports), a 16 MHz crystal oscillator, a USB
connection, a power jack, an ICSP header, and a reset button. It contains everything
needed to support the microcontroller; simply connect it to a computer with a USB
cable or power it with a AC-to-DC adapter or battery to get started. The Mega 2560
board is compatible with most shields designed for the Uno and the former boards
Duemilanove or Diecimila.
Key Features
Microcontroller: ATmega2560 AVR
Operating voltage: 5 V
Clock speed: 16 MHz
Flash memory: 256 KB
SRAM: 8 KB
EEPROM: 4 KB
54 digital I/O pins
16 analog input pins
15 PWM output pins
4 hardware UART serial ports
Supports:
UART
SPI
I2C communication
USB interface for programming and power
Compatible with Arduino shields
Ideal for:
Robotics
3D printers
Automation systems
IoT projects
Complex embedded applications
This component belongs to the category:
Development Board / MCU Evaluation Board / Embedded System Platform.
Properties
Development Board
Arduino
A000067
A
parametric-v1
Pricing & Availability
Distributor | Qty 1 |
|---|
Controls
Welcome 👋
Flux accelerates your PCB design with AI.
Create your account to start using this component and bring your ideas to life.
benschockaert
copilot