ESP32 Schematics
The ESP32 is a low-cost, low-power microcontroller with built-in Wi-Fi and Bluetooth capabilities. It is a highly integrated chip designed for the Internet of Things (IoT) and can be used for a variety of applications, including home automation, wearable technology, and industrial control. One of the key features of the ESP32 is its versatility and wide range of available peripherals, including sensors, displays, and communication modules. This makes it ideal for use in a variety of projects and applications, such as home security systems, smart home devices, and industrial automation systems. Flux.ai has the world's largest community-driven public library of ESP32 devices, with a range of footprints, symbols, datasheets, and simulation models available for users. This extensive library allows developers and designers to easily incorporate the ESP32 into their projects and take advantage of its powerful capabilities. Whether you are building a simple IoT device or a complex industrial control system, the ESP32 is an excellent choice due to its versatility and wide range of available resources.
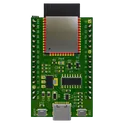
Adafruit HUZZAH32 - ESP32 Feather
The HUZZAH32 is our ESP32-based Feather, made with the official WROOM32 module. We packed everything you love about Feathers: built in USB-to-Serial converter, automatic bootloader reset, Lithium Ion/Polymer charger, and just about all of the GPIOs brought out so you can use it with any of our Feather Wings.
230 Uses2 StarsESP32-C3 ADS1115 pH ORP Sensor Interface 4412
3.3 V-powered pH and ORP probe interface using an ADS1115 module, MCP6002 through-hole buffers, and DS18B20 temperature sensing. External ESP32 connection is through one 5-pin header carrying 3V3, GND, SDA, SCL, and DQ; ADS1115 ADDR is fixed locally and ALERT is unused.
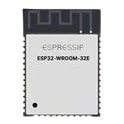
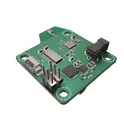
0 Uses1 StarsESP32-WROOM-32E Reference Design 0a6b
This project is a reference design for an ESP32-WROOM-32E based device. It features USB-C for power and data transfer, onboard voltage regulation, and multiple peripheral connections. It also includes a CH340C for USB to serial conversion #referenceDesign #project #ESP32 #ESP32WROOM #RF #WIFI #MCU #simpleEmbedded #espressif #template
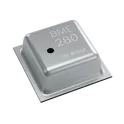
0 Uses1 StarsBME280
Humidity, Pressure, Temperature 0 ~ 100% RH I²C, SPI ±3% 1 s Surface Mount BME280 I2C breakout module The BME280 integrates three sensors—temperature, relative humidity, and pressure—along with a high-performance digital interface. It communicates via I²C or SPI, making it easy to interface with microcontrollers like Arduino, ESP32, and STM32. It is designed for low power consumption, making it suitable for battery-powered applications such as portable weather stations and smart home devices. Key Features Environmental Sensing Measures: Temperature Relative Humidity Barometric Pressure Enables altitude estimation based on pressure readings High Accuracy Temperature: ±1.0°C (typical) Humidity: ±3% RH (typical) Pressure: ±1 hPa (typical) Low Power Consumption Typical current: ~0.6 µA (sleep mode) ~3.6 µA (measurement mode) Ideal for battery-operated devices Communication Interfaces Supports: I²C (up to 3.4 MHz) SPI (3-wire / 4-wire) Easy integration with most microcontrollers Compact Package Small footprint: 2.5 × 2.5 × 0.93 mm LGA package Suitable for space-constrained designs Built-in Features Factory-calibrated coefficients stored in NVM Configurable oversampling and filtering Integrated ADC for high-resolution measurements #commonpartslibrary #sensor #humidity #pressure
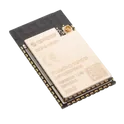
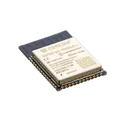
318 Uses1 StarsESP32-S3-WROOM-1-N8R8
Bluetooth, WiFi 802.11b/g/n, Bluetooth v5.0 Transceiver Module 2.4GHz PCB Trace Surface Mount The ESP32-S3-WROOM-1-N8R8 is a high-performance Wi-Fi and Bluetooth Low Energy (BLE) module from Espressif Systems, designed for advanced IoT, edge AI, smart devices, industrial automation, and embedded applications. It is based on the ESP32-S3 SoC featuring a dual-core Xtensa® LX7 processor running up to 240 MHz, integrated wireless connectivity, and enhanced AI acceleration capabilities. The N8R8 variant includes 8 MB Flash memory and 8 MB Octal SPI PSRAM, making it suitable for memory-intensive applications such as machine learning, image processing, graphical user interfaces, and data logging. Key Features Dual-core 32-bit Xtensa LX7 CPU operating up to 240 MHz Integrated 2.4 GHz Wi-Fi (802.11 b/g/n) Bluetooth 5 LE (Low Energy) support 8 MB Flash memory 8 MB Octal SPI PSRAM Vector instructions and hardware acceleration for AI/ML workloads Integrated PCB trace antenna USB OTG and USB Serial/JTAG support Rich peripheral set including: GPIO ADC UART SPI I²C I²S PWM USB Operating voltage: 3.0 V to 3.6 V Wireless data rates up to 150 Mbps RF output power up to 20.5 dBm High receiver sensitivity down to –104.5 dBm Surface-mount 41-pin module package Industrial operating temperature range up to -40°C to +85°C (module-dependent specification) #Module #RF-Transceiver #Esp32
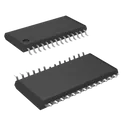
385 Uses1 StarsPCA9685PW,118
LED Driver IC 16 Output Linear PWM Dimming 25mA 5.5V 28-TSSOP PCA9685PW,118 is a 16-channel, 12-bit PWM LED controller with an I²C interface designed for LED dimming, RGB/RGBA lighting, and servo motor control applications. It provides independent PWM control for up to 16 outputs, allowing precise brightness or position control while minimizing MCU GPIO usage. The device supports Fast-mode Plus I²C communication up to 1 MHz and operates from a 2.3 V to 5.5 V supply range. It is commonly used in robotics, LED backlighting, automation systems, and PWM expansion modules for microcontrollers such as Arduino, ESP32, and Raspberry Pi. Key Features 16 independent PWM output channels 12-bit PWM resolution (4096 steps) Programmable PWM frequency from approximately 24 Hz to 1526 Hz I²C Fast-mode Plus compatible interface up to 1 MHz Six hardware address pins allowing up to 62 devices on one I²C bus Programmable open-drain or totem-pole outputs Output capability: 25 mA sink current 10 mA source current Internal 25 MHz oscillator with optional external clock input Individual programmable LED ON/OFF timing for reduced EMI and current surges Supports software reset and group addressing (All Call/Sub Call) 5.5 V tolerant inputs and outputs Operating voltage range: 2.3 V to 5.5 V Package: 28-pin TSSOP (PW suffix) #CommonPartsLibrary #IntegratedCircuit #PowerManagement #LEDdriver
73 Uses1 StarsAuto-Layout Example May 2025
Learn how to use AI Auto Layout on this ESP32 Espresso Smart Scale! In one click you’ll see AI Auto Layout perform magic. Pay close attention to how we recommend creating rulesets, zones, and fanouts. By copying the setup in this example on your own project, you’ll have a fully routed board in no time!
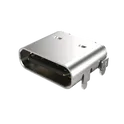
0 Uses1 StarsUSB4105-GF-A
USB-C (USB TYPE-C) USB 2.0 Receptacle Connector 24 (16+8 Dummy) Position Surface Mount, Right Angle; Through Hole The USB4105-GF-A is a USB Type-C receptacle connector designed for USB 2.0 applications, commonly used in embedded systems, IoT devices, and consumer electronics. It features a 24-position (16 active + 8 dummy) contact design that supports reversible plug orientation, making it user-friendly and compliant with USB Type-C standards. This connector is a right-angle, surface-mount (SMT) device with through-hole retention tabs, providing both compact PCB integration and strong mechanical stability. Key Features USB Type-C Interface Reversible plug orientation (no wrong insertion) Standard USB Type-C receptacle Supports USB 2.0 signaling Contact Configuration 24 pins total (16 active + 8 dummy pins) Includes: Power (VBUS) Ground (GND) USB 2.0 data (D+, D−) Configuration channel (CC) Electrical Capability Supports multiple current levels (up to 5A depending on design) Rated voltage up to 48V DC Mechanical Design Right-angle (horizontal) mounting Surface-mount + through-hole hybrid Includes: Board guide Solder retention tabs (strong anchoring) Durability & Materials Shielded metal shell (EMI protection) Contact finish: Gold plating Housing: UL94 V-0 flame rated Mating cycles: ~20,000 insertions Environmental Specs Operating temperature: -40°C to +85°C RoHS compliant (lead-free) Typical Applications Microcontroller boards (ESP32, Arduino, etc.) Charging + data interface for embedded devices Power + USB communication ports Consumer electronics (gadgets, accessories) #CommonPartsLibrary #Connector #USB #DVI #USB4105 #USB-C
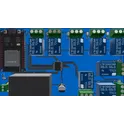
2.3k Uses1 StarsESP32 Robot Controller | AI Design Review Tutorial [Example]
Spot the mistake! Learn how to use AI to conduct a design review on an ESP32-based control board. This project is ideal for autonomous or radio-controller robots featuring inputs for sensors, encoders, and a Flysky RC receiver, plus an I2C display for configuration.
0 Uses1 Stars


![ESP32 Robot Controller | AI Design Review Tutorial [Example]](https://img-cdn.flux.ai/eyJidWNrZXQiOiJncmF2aXRvbi1lbGVjdHJpYy1zeW1ib2xzIiwia2V5IjoiZG9jdW1lbnRfYXNzZXRzL1RodW1ibmFpbC1FU1AzMi0tMS0tZTNjNjM0OGEtYjEzMy00YjliLWEyYTItMzY1MGNiMjgyYWJiLnBuZyIsImVkaXRzIjp7InJlc2l6ZSI6eyJ3aWR0aCI6MTI0LCJoZWlnaHQiOjEyNCwiZml0IjoiY29udGFpbiIsImJhY2tncm91bmQiOnsiciI6MCwiZyI6MCwiYiI6MCwiYWxwaGEiOjB9fX0sIm91dHB1dEZvcm1hdCI6IndlYnAifQ==)