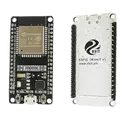
ESP32 Schematics
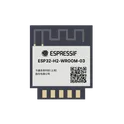
The ESP32 is a low-cost, low-power microcontroller with built-in Wi-Fi and Bluetooth capabilities. It is a highly integrated chip designed for the Internet of Things (IoT) and can be used for a variety of applications, including home automation, wearable technology, and industrial control. One of the key features of the ESP32 is its versatility and wide range of available peripherals, including sensors, displays, and communication modules. This makes it ideal for use in a variety of projects and applications, such as home security systems, smart home devices, and industrial automation systems. Flux.ai has the world's largest community-driven public library of ESP32 devices, with a range of footprints, symbols, datasheets, and simulation models available for users. This extensive library allows developers and designers to easily incorporate the ESP32 into their projects and take advantage of its powerful capabilities. Whether you are building a simple IoT device or a complex industrial control system, the ESP32 is an excellent choice due to its versatility and wide range of available resources.
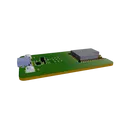
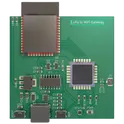
LoRa to WiFi Gateway Reference Design
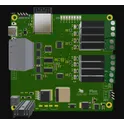
This project is a LoRa to WiFi Gateway using an ESP32 microcontroller. The design incorporates a LoRa transceiver and a WiFi module to facilitate data transfer between LoRa and WiFi protocols. This gateway can be directly implemented in IoT-based applications where field devices using LoRa need to communicate with WiFi-enabled devices. #referenceDesign #project #ESP32 #LoRa #lora #hub #gateway #ESP32WROOM #RF #WIFI #MCU #referenceDesign #edge-computing #espressif #seeed #seeed-technology #reference-design
0 Uses2 StarsMAX98357 Audio DAC Breakout 077b
This compact breakout board makes it easy to add high-quality audio output to your microcontroller projects using the MAX98357A/B Class D audio amplifier. Perfect for Arduino, ESP32, Raspberry Pi, or any microcontroller with I2S output capabilities. Features High-Performance Audio: Delivers Class AB audio quality with Class D efficiency (92% efficient at 1W) Powerful Output: 3.2W into 4Ω speakers at 5V supply Clean Sound: Low distortion (0.013% THD+N at 1kHz) Wide Supply Range: Operates from 2.5V to 5.5V Simplified I2S Interface: No MCLK required, just BCLK, LRCLK, and DIN Selectable Gain: Solder jumpers for easy gain selection (3dB, 6dB, 9dB, 12dB, or 15dB) Channel Selection: Configure for left, right, or combined (mono) output Filterless Design: No need for external output filtering components Compact Form Factor: Minimal board space with optimized layout Applications Smart speakers and voice assistants Portable audio devices IoT audio projects Gaming devices and sound effects Educational audio projects Digital instrument amplification The FLUX MAX98357 breakout board requires only three I/O pins plus power, making it the perfect audio solution for projects where simplicity and sound quality matter.
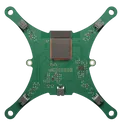
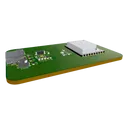
0 Uses2 StarsSelfCare Plant Final Design
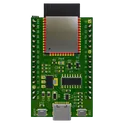
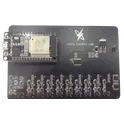
This project is a reference design for an ESP32-WROOM-32E based device. It features USB-C for power and data transfer, onboard voltage regulation, and multiple peripheral connections. It also includes a CH340C for USB to serial conversion #referenceDesign #project #ESP32 #ESP32WROOM #RF #WIFI #MCU #referenceDesign #simple-embedded #espressif #template #reference-design
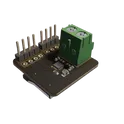
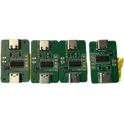
0 Uses2 StarsCustom Programmer for ESP32 Using USB-C USB3.0 Pins
NOT RECOMMENDED FOR NEW DESIGNS. It did not work during testing. Please refer to [my other project that worked successfully.](https://www.flux.ai/markwuflux/ch340c-esp32-programmer-v2-bottom-layer) Using this programmer to exploit the extra pins given by a USB 3.0 Superspeed cable. By doing so, you can program an ESP32 without adding a programmer port. NOT Compliant with USB-C Standard
0 Uses2 Stars
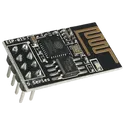
ESP32 LoRa Transceiver
0 Uses2 Stars

![[Example] ESP32 Reference Design](https://img-cdn.flux.ai/eyJidWNrZXQiOiJncmF2aXRvbi1lbGVjdHJpYy1zeW1ib2xzIiwia2V5IjoiZG9jdW1lbnRfYXNzZXRzL2VzcDMyLWM3OGU1YTg3LThmNzgtMGVkZS1mODc3LTYwZjdiMDM0MjRkNS5wbmciLCJlZGl0cyI6eyJyZXNpemUiOnsid2lkdGgiOjEyNCwiaGVpZ2h0IjoxMjQsImZpdCI6ImNvbnRhaW4iLCJiYWNrZ3JvdW5kIjp7InIiOjAsImciOjAsImIiOjAsImFscGhhIjowfX19LCJvdXRwdXRGb3JtYXQiOiJ3ZWJwIn0=)