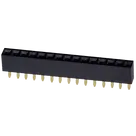
NodeMCU-ESP32 Pin Connections

0:52

Below is the planned approach:
  1. Add the NodeMCU ESP32 to your schematic (for example, assign it the designator U1).
  2. Create net connections for each of its exposed pins to the corresponding PCB header pads using the default order. Based on the pads currently in your project, the mapping will be as follows:

Table


NodeMCU-ESP32 PinPCB Terminal (Header Pad)
Pin 1Pin_8
Pin 2Pin_1
Pin 3Pin_12
Pin 4Pin_13
Pin 5Pin_6
Pin 6Pin_15
Pin 7Pin_11
Pin 8Pin_4
Pin 9Pin_3
Pin 10Pin_7
Pin 11Pin_2
Pin 12Pin_14
Pin 13Pin_9
Pin 14Pin_5
Pin 15Pin_10
With this mapping confirmed, the next step is to add the NodeMCU ESP32 to the schematic and then create schematic nets connecting each NodeMCU pin to its respective header pad as shown.
delete that one i need a 19 pin not 15

0:55

Thought for a moment

Thought for a moment

Thought for a moment

Thought for a moment

Thought for a moment

Thought for a moment

Thought for a moment

Thought for a moment

Thought for a moment

Thought for a moment

Thought for a moment

Thought for a moment

Thought for a moment

Thought for a moment

Thought for a moment

Thought for a moment

Thought for a moment

Thought for a moment

Thought for a moment

Thought for a moment

Thought for a moment

Thought for a moment

Thought for a moment

Thought for a moment

Thought for a moment

Thought for a moment

Thought for a moment

Thought for a moment

Thought for a moment

Thought for a moment

Thought for a moment

Thought for a moment

Thought for a moment

Thought for a moment

Thought for a moment

Thought for a moment

Thought for a moment

Thought for a moment

Thought for a moment

Thought for a moment

Thought for a moment

Thought for a moment

Thought for a moment

Thought for a moment

Thought for a moment

Thought for a moment

Thought for a moment

Thought for a moment

Thought for a moment

Thought for a moment

Thought for a moment

Thought for a moment

Thought for a moment

Thought for a moment

Thought for a moment

Thought for a moment

Thought for a moment

Thought for a moment

Thought for a moment

Thought for a moment

Thought for a moment

Thought for a moment

Thought for a moment

Thought for a moment

Thought for a moment

Thought for a moment

Thought for a moment

Thought for a moment

Thought for a moment

Thought for a moment

Thought for a moment

Thought for a moment

Thought for a moment

Thought for 4 sec

Thought for 1 sec

Thought for a moment

Thought for a moment

Thought for a moment

Thought for a moment

Thought for a moment

Thought for a moment

Thought for a moment

Thought for a moment

Thought for a moment

Thought for a moment

Thought for a moment

Thought for a moment

Thought for a moment

Thought for a moment

Thought for a moment

Thought for a moment

Thought for a moment

Thought for a moment

Thought for a moment

Thought for a moment

Thought for a moment

Thought for a moment

Analyzing in depth.

Thought for 11 sec

I've made a plan, and started work on it.
Use 19-pin connector
Find replacement
Check pinout
Run ERC/DRC

Finished working

To get started, talk to Flux or create a New Document.

Documents

    Documents are markdown text files which describe project goals, capture details, or even simulation outputs.

    Assets

    1x15 V.png

    1x15 V.png

    1x15 VThumbnail
    step

    PinSocket_1x15_P2.54mm_Vertical.step

    3D3D Model
    kicad_mod

    PinSocket_1x15_P2.54mm_Vertical.kicad_mod

    FOOTPRINT_V5Footprint
    Conn_01x15

    Conn_01x15

    defaultDefault

    Pin Socket 01x15 2.54mm Vertical

    Pin Socket 01x15 2.54mm Vertical thumbnail
    Through Hole straight socket strip, 01x15, 2.54mm pitch, single row #connector #pinsocket #tht

    Properties

    Connector

    J

    Pricing & Availability

    Distributor

    Qty 1

    Controls