ESP32 x86 PC Peripherals List

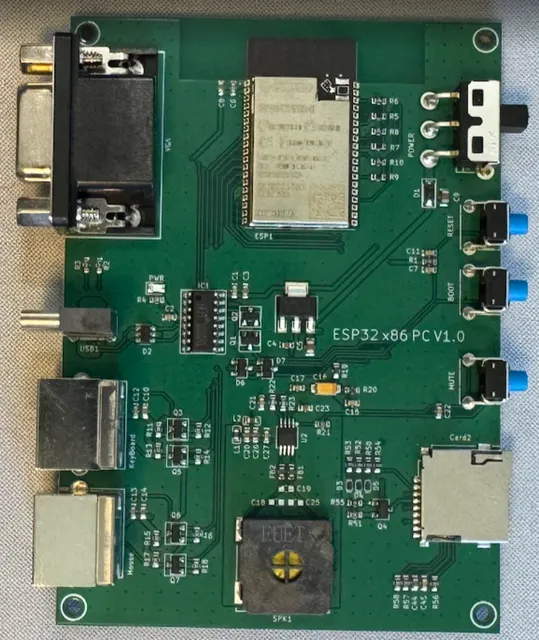
Add text labels on this photo of the PCB that I designed in current project for each connector, power switch, buttons, speaker, SD card connector, and power LED indicator
And create document with photo with the labels and list with labeled components with descriptions
Image
Thought for 11 sec
I’ll annotate the provided PCB photo and create a project document containing the labeled image plus a concise component list.
Worked for 1 min 53 sec
Done — I created the project document “ESP32 x86 PC — Labeled PCB Photo” with the annotated PCB photo and a table of labeled components/descriptions.
Document slug:
esp32-x86-pc-labeled-pcb-photoReview docs and layout
Check document rendering
Run ERC DRC
Review layout manufacturability
Export documentation PDF
Refine this doc
Ask about this doc
Flashing Guide
This guide walks you through installing the firmware onto your ESP32 x86 PC board.
Requirements
- The ESP32 x86 PC board
- A USB-C cable (data-capable)
- A computer running Windows, macOS, or Linux
- A microSD card (FAT32 formatted, 32GB or smaller recommended)
- Internet connection (the board downloads OS images on first boot)
1. Install the Arduino IDE
Download and install the Arduino IDE from arduino.cc/en/software.
2. Add ESP32 board support
- Open File → Preferences.
- In Additional Boards Manager URLs, add:
https://espressif.github.io/arduino-esp32/package_esp32_index.json - Open Tools → Board → Boards Manager.
- Search for esp32 and install version 2.0.17.
3. Install the FabGL library
- Open Tools → Manage Libraries.
- Search for FabGL.
- Click Install.
4. Open the sketch
- Download the project firmware PCEmulator_Flux.zip.
- Extract files from .ZIP
- Keep all the project files together in a single folder with the same name as the
.inofile. - Open the
.inofile in the Arduino IDE.
5. Configure the board settings
Under the Tools menu, set the following:
Table
| Setting | Value |
|---|---|
| Board | ESP32 Wrover Module |
| Partition Scheme | Huge APP (3MB No OTA/1MB SPIFFS) |
| PSRAM | Disabled |
| Upload Speed | 921600 |
| Flash Frequency | 80 MHz |
6. Select the port
- Connect the board to your computer with the USB-C cable.
- Open Tools → Port.
- Select the port that appears for your board.
7. Upload
- Click the Upload button (the right-arrow icon) in the Arduino IDE.
- Wait for compilation and upload to complete. You will see Done uploading when finished.
8. First boot
- Connect the board's VGA port to a monitor.
- Connect a PS/2 keyboard and mouse.
- Insert the microSD card.
- Power the board.
On first boot the emulator will:
- Ask you to connect to WiFi — select your network and enter the password using the keyboard.
- Download the selected operating system disk image to the SD card.
- Sync the date and time from the internet, then restart automatically.
After the restart, the machine selection menu appears. Choose a configuration and press Run to boot into DOS.
9. Everyday use
Once an OS image is on the SD card, the board boots straight to the machine selection menu — no WiFi or download needed.
Press ALT + PRINT SCREEN at any time during emulation to open the SYSREQ menu, where you can:
- Restart the emulator
- Restart the machine
- Mount a different floppy or disk image
- Re-sync the date and time from NTP
You're ready to go. Select a machine, press Run, and you're at
C:\>.Requirements
1. Install the Arduino IDE
2. Add ESP32 board support
3. Install the FabGL library
4. Open the sketch
5. Configure the board settings
6. Select the port
7. Upload
8. First boot
9. Everyday use