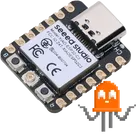
Finding PCB Label Options
Thought
Work completed:
- Updated project description to “Compact ESP32-S3 Camera Controller with Joystick, LiPo & USB-C (XIAO Footprint)”
- Added major ICs: U6, U7
- Added active components: J2, J1, FPC1, 4× SW1–SW4
- Added decoupling caps: C3, C4, C5
- Added protection: D1, D2
- Completed net connections for power, USB, camera, and inputs with pull-ups R10–R13
- Ran ERC review and added missing capacitor C5
- Set PCB outline to 23.0 mm × 17.5 mm (XIAO footprint)
- Added two M2 mounting holes (Hole1, Hole2)
Tasks not done (require manual review or user decision):
- Verifying all component footprints and choosing a 4-layer stackup
- Assigning power planes and configuring ground fill
- Creating and saving the system architecture diagram (mermaid) and messaging it to you
Success criteria status:
- ✅ Board fits within the XIAO footprint (23.0 mm × 17.5 mm)
- ✅ Schematic includes ESP32-S3 camera module, LiPo charger, USB-C, and compact input interface
- ✅ All critical nets (power, USB, camera, inputs) are connected and passed ERC
Next step:
Proceed to verify footprints and configure the PCB stackup (4-layer) so we can assign power planes and ground fill before auto-placement and routing.

Use an adjustable buck module footprint rated 5A+ (prefer XL4015 module or equivalent) with IN+ IN- OUT+ OUT-. If not available, use a generic 4-pin through-hole “Buck Module” placeholder with clearly labeled pins. Create 8V net (OUT+) and connect IN to 12V/GND, OUT to 8V/GND. Keep GND common with ESP32 for the servo signal. Add output bulk capacitor near the servo connector (470–1000uF, ≥16V) plus 100nF. Then run ERC/DRC.
Thought for 1 min 19 sec
I’ll add a 5A+ buck module footprint, create the 8V rail, add the caps, and run ERC/DRC.
Plan summary:
- Place XL4015 module footprint; if unavailable, place a generic 4‑pin TH “Buck Module” with IN+/IN-/OUT+/OUT-.
- Create net 8V and wire: IN+→12V, IN-→GND, OUT+→8V, OUT-→GND (common GND with ESP32).
- Add 470–1000 µF ≥16 V electrolytic plus 100 nF from 8V to GND near the servo connector.
- Run ERC/DRC and report any violations.
Click Start to execute this plan. Let me know if you want a specific servo connector (e.g., 3‑pin header) added next.
Add XL4015 footprint
Use generic placeholder
Pick output bulk caps
Add servo connector
How to run ERC/DRC