Chat

Welcome to Flux

Treat Flux like your intern. Tell it what you'd like to build and it'll get to work. You can also ask it questions, brainstorm ideas, and teach it your preferences. Learn More

Explain project
Write a project description
Find schematic issues
Create a test plan
Simulate a circuit
Prepare for Manufacturing
Component Selection Workflow
New Subsystem Wizard
Write I2C initialization code
Generate firmware skeleton
U1
please explain what U1 does.

@copilot please explain what U1 does.
1y
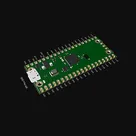
Explanation of U1: Raspberry Pi Pico Overview
U1 in your project is a Raspberry Pi Pico. This microcontroller board is powered by the RP2040 chip and offers a wide range of GPIO (General-Purpose Input/Output) pins along with other functionalities. Let's break down what U1 can do for you.
Key Features:
  • Microcontroller: RP2040, a dual-core Arm Cortex-M0+ processor with a flexible clock running up to 133 MHz.
  • GPIO Pins: 26 multi-function GPIO pins, including 3 analog inputs.
  • Memory: 264KB of SRAM and 2MB of flash memory.
  • Interfaces:
    • I2C
    • SPI
    • UART
    • PWM
    • USB 1.1 Host/Device functionality
  • Power Supply: Operates at 3.3V logic level; can be powered via a micro-USB connector or other pins like VSYS and VBUS.
Important Pins:
Here are some important pins on the board based on the list provided:
  • Power Pins:
    • VSYS (Pin 39): Main system input voltage $1.8V - 5.5V$
    • VBUS (Pin 40): Voltage from the USB port $5V$
    • 3V3 (Pin 36): $3.3V$ output from on-board regulator
    • 3V3_EN (Pin 37): Enable pin for $3.3V$ regulator
    • GND (Multiple Pins): Ground
  • GPIO Pins:
    • Pins 1, 2, 4, etc., provide multi-function GPIO capable of being configured for I2C, SPI, UART, PWM, and digital I/O.
    • Pins 31, 32, 34: Analog inputs (ADC)
  • Special Function Pins:
    • RUN (Pin 30): Reset pin
    • SWCLK (Pin 41) & SWDIO (Pin 43): SWD interface for debugging.
Potential Applications:
  • Prototyping IoT Devices: Due to its flexibility and GPIO availability.
  • Embedded Projects: Robotics, automation, and control systems.
  • Educational Purposes: Learning platform for programming and electronics.
Example Usage:
To start using U1 in your project, you could connect various sensors, actuators, and other peripheral devices to its GPIO pins.
Sample connection setup:
  • LED on GPIO Pin:
    • Connect an LED's anode (longer leg) to U1:GPIO6.
    • Connect the LED's cathode (shorter leg) to a resistor, and the other end of the resistor to U1:GND (pin 8 or any other ground pin).
Feel free to let me know if you need more specific details or a particular application setup!
1y
Someone is typing...
1
P10
P3
P11
P6
P8
P5
P9
P7
P4
P1
P2

No files yet

Documents

    Documents are markdown text files which describe project goals, capture details, or even simulation outputs.

    Assets

    pico-template.png

    pico-template.png

    pico-templateThumbnail
    Raspberry Pi Pico Shield Template thumbnail
    Explore the Raspberry Pi Pico Template
    Unleash the power of these flexible microcontroller boards, starting at just $4.
    The Raspberry Pi Pico series features a range of compact, high-performance boards powered by the RP2040 chip.

    Properties

    Properties describe core aspects of the project.

    Pricing & Availability

    Distributor

    Qty 1

    LCSC

    $6.33

    Controls