Chat

Welcome to Flux

Treat Flux like your intern. Tell it what you'd like to build and it'll get to work. You can also ask it questions, brainstorm ideas, and teach it your preferences. Learn More

Explain project
Write a project description
Find schematic issues
Create a test plan
Simulate a circuit
Prepare for Manufacturing
Component Selection Workflow
New Subsystem Wizard
Write I2C initialization code
Generate firmware skeleton
WRITE 12V HERE

@copilot WRITE 12V HERE
1y
It seems like you're requesting to place a 12V label or perhaps indicate a 12V power supply point on your schematic. Could you provide more context about where specifically you'd like to note this? For example, is it for a specific component, net, or part of the circuit? Additionally, are you looking to add this as a text label directly on the schematic, or do you need help with connecting a 12V power supply? Let me know how I can assist!
1y
I WANT TO ADD IT AS A TEXT LABLE DIRECTLY ON THE SCHEMATIC
1y
To add a "12V" text label directly on your schematic in Flux, you can follow these general steps:
  1. Select the Text Tool: Look for the text or annotation tool in the toolbar. It's usually represented with a "T" icon or something similar.
  2. Place the Text: Click on the spot in the schematic where you want the "12V" label to appear.
  3. Enter the Text: A text field should open where you can type "12V".
  4. Adjust Appearance: You might have options to adjust the font size, style, or orientation to make the label more visible or fit the schematic aesthetics.
  5. Position the Label: If necessary, you can drag the text to reposition it for clarity.
You can refer to the Flux documentation if you need more detailed instructions for your specific interface. Let me know if you have any questions or need further assistance!
1y
there is no toolbar
1y
If you don’t see a toolbar or option directly for adding text in Flux, you can try this alternative approach to add a text label:
  1. Right-Click or Context Menu: Sometimes, right-clicking on the schematic area or using the context menu can bring up options for adding elements like text. Look for an "Add Text" or "Annotation" option.
  2. Keyboard Shortcut: Flux may have keyboard shortcuts for common actions. You might try common shortcuts like T for text if applicable.
  3. Schematic Elements Panel: Check if there's a panel or menu specifically for schematic elements. This might contain text or annotation options.
  4. Property or Inspector Panel: Some tools have inspector or property panels that allow annotations or documentation details to be added.
  5. Help or Documentation: If the above methods don't work, checking the help section or documentation within Flux might provide precise instructions for adding text labels.
Let me know if these tips help or if you need further guidance!
1y
help me remove this comment
1y
To remove a comment or annotation from your schematic in Flux, you might generally follow these steps:
  1. Select the Comment: Click on the comment or annotation text that you want to remove. It should become highlighted or selected.
  2. Delete the Comment:
    • You can often press the Delete or Backspace key on your keyboard to remove the selected comment.
    • Alternatively, check if a context menu appears when you right-click on the selected comment. Look for a "Delete" or "Remove" option.
  3. Confirm Deletion: Some tools may ask for confirmation to delete the comment. Confirm if prompted.
If these steps don't align perfectly with how Flux operates or if there's no direct method visible, referring to documentation or support specific to Flux could provide more tailored instructions based on their latest UI updates.
Let me know if you manage to remove the comment or need further assistance!
1y
2
IR Trasmitter
KW11
U1
A4988
A4988
LASER MODULE
KW11
V1
KW11
KW11
A4988
A4988
Q1
U4

No files yet

Documents

    Documents are markdown text files which describe project goals, capture details, or even simulation outputs.

    Assets

    Arduino UNO.STEP

    Arduino UNO.STEP

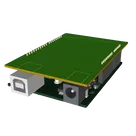
    Arduino UNO 3D3D Model

    Arduino UNO R3 shield - Shape.dxf

    Arduino UNO R3 shield - Shape
    Arduino Uno R3 Shield Template-removebg-preview.png

    Arduino Uno R3 Shield Template-removebg-preview.png

    Arduino Uno R3 Shield Template-removebg-previewThumbnail

    Arduino Uno R3 Shield Template

    Arduino Uno R3 Shield Template thumbnail
    Template for Arduino Uno R3 Shield. Include an official pinout so you will always know Arduino names, the alternative roles of pins, which one is SDA, or SCL, etc. On PCB you can find the 3D model of the Arduino Uno R3 itself along with the board outline on the silkscreen. #Arduino #Uno #Shield #Template #project-template #project

    Properties

    Properties describe core aspects of the project.

    Pricing & Availability

    Distributor

    Qty 1

    Arrow

    $0.72–$1.38

    Digi-Key

    $6.17–$11.24

    LCSC

    $14.79–$14.81

    Mouser

    $8.39

    Verical

    $0.47–$4.55

    Controls