Project Overview and Features
Thought for 2 mins 51 sec
Here’s a clear overview of what this project is, what it does, and its main building blocks.
What it does
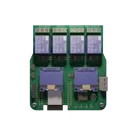
- Purpose: Dual-tank water level monitor using two ultrasonic sensors and an ESP32. It can display/report levels and drive external loads via relay outputs for automation.
- Power: Designed around a wide “7–30 V” input net that is stepped to 5 V and then to 3.3 V for the ESP32 and logic.
- Interfaces: Two dedicated ultrasonic sensor ports, two I2C expansion sockets (e.g., for an OLED), a UART/programming header, and two full 2x10 headers that break out ESP32 IO.
Main components and functions
Table
| Main components and functions |
|---|
| U1 |
| U2 + power stage: L1, D5, bulk/decoupling caps (C5, C6, C9) |
| U12 + 3V3 decoupling (C1, C7, C8) |
| Dual ultrasonic sensor connector J11 |
| I2C expansion sockets J5, J6 |
| Power terminal J4 |
| 4x modular relays RL1, RL2, RL3, RL4 |
| Per-relay status LEDs LED1, LED2, LED3, LED4 with series resistors R7, R8, R9, R10 |
| Programming/UART header J3 |
| Full IO breakout headers J1, J2 |
| Tact switches EN, IO0 + pull parts R6, R5 |
How it works (signal mapping)
- Ultrasonic ports (two independent channels)
- I2C expansion
- Relays
- UART/programming
- Power path
Coolest features
- Dual ultrasonic channels with dedicated Trigger/Echo lines and power on a single 6-pin socket.
- Four on-board, 5 V relay modules with per-channel status LEDs for immediate visual feedback.
- Wide-input power design with on-board 5 V buck and 3.3 V LDO rails, so the system can be powered from a broad range (net labeled “7–30 V”).
- Two I2C sockets for drop-in peripherals like an OLED or extra sensors.
- Full ESP32 breakout via two 2x10 headers, plus a clean UART/programming header and boot/reset buttons.
- Mounting holes (M3) for easy enclosure integration.
Current design health (automated checks)
- Manufacturing: Many generics lack MPNs (e.g., resistors, capacitors, some connectors, inductor). This is flagged under “Manufacturer Part Number” and will need real parts assigned before ordering.
- Layout: “Floating copper” and “Layers with Multiple Fills” errors, and “Overlapping Copper” warnings are present. These should be resolved before fabrication.
- Missing-parts checks (e.g., decoupling/pull-ups) haven’t been run by the automated assistants, but the schematic already includes pull-ups for EN/IO0 and multiple decoupling capacitors.
If you want, I can help you: assign concrete MPNs to the generics, validate the ultrasonic header pinout against your sensors, and prepare the board for manufacture (resolve DRC errors, finalize footprints).
Clarify ultrasonic headers
Choose ultrasonic model
Resolve DRC copper issues
Assign real MPNs
Power-stage validation