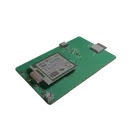
Project Thumbnail Update

I’ll set the uploaded PNG as the project thumbnail. I’ll first inspect existing assets, then create/update the image asset with the thumbnail flag.
I’ll update the project description to include that it was vibe-hardwared in 30 minutes, while preserving the existing description.
Done — the project thumbnail is set, and the description now includes: “Vibe-hardwared in 30 minutes.”
Add date and goal
Document session
Review before sharing
Generate BOM
J1
U1
Not Recommended for New Designs
U3
DISP1 CS - U1 IO10
DISP1 BUSY - U1 IO5
SW4 1 - U1 TXD0
U2 STAT - D2 K
U2 VBAT - J2 1
SW3 1 - U1 RXD0
DISP1 D/C - U1 IO4
J1 VBUS_B - U2 VDD
J1 VBUS_B - U2 VDD
J1 CC1 - R4 P1
U2 VBAT - J2 1
J1 CC2 - R5 P1
SW3 1 - U1 RXD0
J1 CC1 - R4 P1
SW4 1 - U1 TXD0
J1 DN1 - J1 DN2
DISP1 SDI - U1 IO7
U3 VOUT - C4 P1
U1 IO19 - D1 I/O2_OUT
U1 EN - R1 P2
U3 VOUT - C4 P1
DISP1 CLK - U1 IO6
R8 P2 - U1 IO2
U1 IO18 - D1 I/O1_OUT
U3 VOUT - C4 P1
SW1 1 - U1 IO0
U3 VOUT - C4 P1
J1 DN1 - J1 DN2
J1 VBUS_B - U2 VDD
U2 VBAT - J2 1
U3 VOUT - C4 P1
U2 STAT - D2 K
U2 PROG - R6 P1
U2 VBAT - J2 1
J1 VBUS_B - U2 VDD
DISP1 BUSY - U1 IO5
U2 VBAT - J2 1
U3 VOUT - C4 P1
U1 IO9 - R2 P2
J1 DP2 - D1 I/O2_IN
J1 DP2 - D1 I/O2_IN
U2 PROG - R6 P1
U3 VOUT - C4 P1
SW2 1 - U1 IO1
SW1 1 - U1 IO0
U1 EN - R1 P2
U3 VOUT - C4 P1
U3 VOUT - C4 P1
U1 IO18 - D1 I/O1_OUT
U2 VBAT - J2 1
U1 EN - R1 P2
J1 VBUS_B - U2 VDD
DISP1 CLK - U1 IO6
J1 DN1 - J1 DN2
DISP1 D/C - U1 IO4
U3 VOUT - C4 P1
U1 IO19 - D1 I/O2_OUT
DISP1 CS - U1 IO10
DISP1 CS - U1 IO10
U1 IO9 - R2 P2
J1 CC2 - R5 P1
D2 A - R7 P2
DISP1 SDI - U1 IO7
R8 P2 - U1 IO2
SW2 1 - U1 IO1
D2 A - R7 P2
SW1
U1 GND - U1 GND
J1 SHIELD - U2 VSS
U1 GND - U1 GND
U1 GND - U1 GND
C4 P2 - C7 P2
U1 GND - U1 GND
J1 SHIELD - J1 SHIELD
SW1 2 - SW2 2
J1 SHIELD - U2 VSS
U1 GND - U1 GND
U1 GND - U1 GND
GND
U1 GND - U1 GND
C4 P2 - C7 P2
U1 GND - U1 GND
J1 SHIELD - U2 VSS
C4 P2 - C7 P2
J2 2 - C6 P2
J2 2 - C6 P2
C4 P2 - C7 P2
U1 GND - U1 GND
J2 2 - C6 P2
U1 GND - U1 GND
GND
SW3
U1 GND - U1 GND
U1 GND - U1 GND
U1 GND - U1 GND
U1 GND - U1 GND
J1 SHIELD - U2 VSS
U1 GND - U1 GND
U1 GND - U1 GND
SW1 2 - SW2 2
U1 GND - U1 GND
U1 GND - U1 GND
J1 SHIELD - U2 VSS
SW4
U1 GND - U1 GND
U1 GND - U1 GND
J2 2 - C6 P2
J2 2 - C6 P2
U1 GND - U1 GND
U1 GND - U1 GND
SW2
C4 P2 - C7 P2
U1 GND - U1 GND
U1 GND - U1 GND
U1 GND - U1 GND
SW1 2 - SW2 2
SW1 2 - SW2 2
J1 SHIELD - U2 VSS
GND
U1 GND - U1 GND
C5
Capacitance
4.7uF
R2
Resistance
10kΩ
R1
Resistance
10kΩ
C7
Capacitance
10uF
U2
R7
Resistance
470Ω
R6
Resistance
10kΩ
DISP1
C2
Capacitance
1uF
C1
Capacitance
100nF
C3
Capacitance
1uF
R8
Resistance
10kΩ
C6
Capacitance
4.7uF
R5
Resistance
5.1kΩ
D1
R3
Resistance
10kΩ
J2
R4
Resistance
5.1kΩ
D2
C4
Capacitance
1uF

Refine this doc
Ask about this doc
Project Specification — E-Ink Tamagotchi
Purpose
Battery-powered handheld virtual pet using an e-paper display for always-on, low-power visuals and physical buttons for user interaction.
Selected Architecture
  • MCU: ESP32-C3-MINI-1-N4 module for SPI display control, GPIO buttons, BLE/WiFi-capable firmware development, and deep sleep.
  • Display: Flux-available 1.54-inch SPI e-paper module (HTEW0154T8). A 2.13-inch exact module was not available in the library; the design uses the closest available SPI e-paper module so the schematic can be completed with a real footprint.
  • Power: USB-C 5 V input, MCP73831 single-cell LiPo charger, JST-PH battery connector, AP2112K-3.3 V LDO rail for MCU/display. User prefers a larger-capacity single-cell LiPo pack; the schematic supports this electrically, and layout/enclosure should reserve battery volume.
  • User input: Four tactile pushbuttons for virtual-pet controls.
  • Protection/status: USB ESD protection, USB-C CC pull-downs, charger/status LED, reset/boot support passives, rail decoupling.
Assumptions
  • Larger-capacity single-cell LiPo battery, nominal 3.7 V, charged from USB-C 5 V. Default charge-current programming is conservative (~100 mA) for thermal safety unless faster charging is requested.
  • Compact SMD implementation unless changed later.
  • E-paper refreshes are infrequent; firmware will use MCU sleep between events to conserve battery.
  • The exact enclosure/form factor will be decided in layout.
Functional Blocks
  1. USB-C input and protection
  2. LiPo charge management and battery connector
  3. 3.3 V system regulator
  4. ESP32-C3 MCU module and boot/reset support
  5. SPI e-paper display interface
  6. Four-button human interface
  7. Status LED and test/debug access
Validation Targets
  • All active components wired per datasheet-recommended circuits.
  • All IC/module power pins decoupled.
  • USB-C sink CC1/CC2 use 5.1 kΩ pull-downs.
  • Charger programming resistor selected for a conservative charge current.
  • ERC review clean before moving to layout.
  • Purpose

  • Selected Architecture

  • Assumptions

  • Functional Blocks

  • Validation Targets

E-Ink Tamagotchi

E-Ink Tamagotchi thumbnail
Battery-powered e-ink virtual pet handheld with low-power MCU, e-paper display, buttons, USB charging, and firmware support. Vibe-hardwared in 30 minutes.

Properties

Rechargeable single-cell LiPo battery via JST-PH connector; sized for larger-capacity pack mechanically, charged from USB-C with MCP73831 at conservative ~100mA by default.

Pricing & Availability

Distributor

Qty 1

Arrow

$0.62–$1.05

Digi-Key

$2.78–$3.61

HQonline

$2.27–$2.37

LCSC

$5.75–$5.92

Mouser

$1.95

TME

$4.31

Verical

$1.02–$1.98

Controls